If you are getting the stuck screen at command prompt "SPECIAL COMMAND" like the one below it could be due to encryption. First decrypt the tablet doing a complete backup because you could loose all your files in the process if something happens.
 |
| Stuck at "Special Command, enter, leave". |
1) Next step is to install BusyBox for Android, probably you don't need help here.
2) Once installed, re-encrypt the tablet including empty space sectors (FULL ENCRYPTION) and when the process is done connect the tablet to pc.
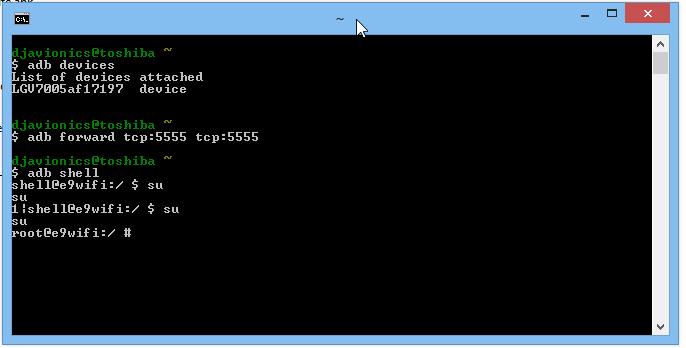
3) We hope you already linked android-sdk to cygwin so open a cygwin terminal and type manually
adb forward tcp:5555 tcp:5555 and press INTRO. In windows 8.1 the copy and paste failed and we don't recommend copy/paste method for some buggy reason pretty hard to explain here.
4) Enter the command adb shell
5) Enter the command su
*If it is the first time, you have to grant permission by unlocking the screen and accepting any request made by the SUPERUSER If you missed, just re enter the command and next time the request will display on a tablet again, but for a few seconds.
 |
| Grant permission to SUPERUSER by unlocking the screen. |
 | ||||
| Finally you will end with a screen like this. |
6) Enter the command (but for me only worked if I wrote manually):
/system/xbin/busybox nc -l -p 5555 -e /system/xbin/busybox dd if=/dev/block/mmcblk0p34
*nothing special happens, mmcblk_p__ could be differentl some tutorials will tell you to dump the entire flash memory and others will explain how to figure out which number is the partition containing your personal data.
7) Open another cygwin instance by clicking the shortcut again and enter:
a) adb forward tcp:5555 tcp:5555
*nothing happens
b) cd /nexus
c) nc 127.0.0.1 5555 | pv -i 0.5 > mmcblk0p34.raw
* Vertical Bar is alt+0124, source website.
* and you should see some flowing logs like:
 |
| Cygwin32 can run more than one instance for this job. You don't need cygwin64 in 64-but Windows OS |


 |
| The process of converting the raw file takes no time. |
 |
| VHDTool.exe will do the trick |
 |
| As shown before, the process is inmediate. |
 | ||
| a) For sure you don't need help where to find the disk management console of Windows |
 |
| b) Browse for the file |
 |
| c) Select from the drop menu not to filter any extension *.* and open it. |
 |
| d) Click OK! |
 |
| e) Oops, this error could happen in Windows 8.1 |
 |
| f) Enable show hidden extensions and rename it from *.raw to *.vhd |
 |
| g) Now you should be able to attach the vhd so repeat the process and initialize it as shown here: |
 |
| h) Select GPT partition |
i) Right Click over the disk to create a new volume with that information, without formatting, with default allocation size.
 |
| i) Create a new volume with that information, without formatting, with default allocation size. |
 |
| j) Cancel the pop-up once new volume and letter are ready. |
11) Now go to My Computer and look for the new drive, format with default allocation size iin FAT32, using quick mode!
12) Your drive should be ready to be scanned by Recuva. We don't recommend using another software as getdataback for fat because they don't have simple user interface, lot of options and in exchange this one will do the job with ease.


No comments:
Post a Comment